Wednesday, 3 July 2013

Jungle Book


I made this simple birthday cake for my nieces’ 6 months birthday. It is easy to make, simple but lovely. I used some cute little animal figures from Woolworths. Following are the steps in decorating the cake

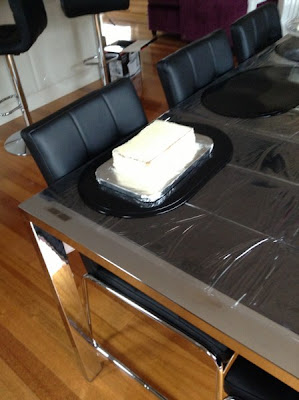
Step 1:  Make a rectangle shaped cake or cut the cake to a rectangle

ButterCake

BirthdayCake

SimpleCake

SimpleBirthdayCake
 Step 2: Cover the entire cake with butter icing

ButterIcing

IcingCake

SimpleIcingCake

Jungle Book
Add caption
Step 3: Decorate the cake using green color icing and animal figures

JungleBook

JungleBookCake

SimpleCake

Jungle Book


Tuesday, 2 July 2013

Nemo Icing Cake

How to make a Nemo cake!!

Easy!!

Step 1: Bake a round shaped cakes

Step 2: Mark a rectangle in the centre

Step 3: Cut off the rectangle

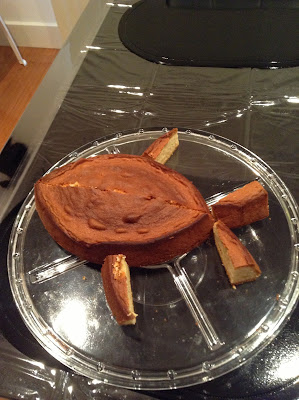
Step 4: Use the cut pieces to make the shape of a fish

FishCake

FishStructure
Add caption

NemoStructure

Nemo

Step 5: Stick the pieces together with butter icing

Step 6: Cover the cake with butter icing

Birthday

Cake

IcingCake

ButterIcing
Add caption

Birthday Cake

Kids Cake
Add caption

Fish Cake

NemoCake

Step 7: Outline.. add detail using writing icing

Step 8: Fill in using colored icing (orange and white)

Nemo

FindingNemo

NemoCake

IcingCake


Step 9: Finish the eye


FindingNemo

How to make a Nemo cake

Step 10: Enjoy the cake

Nemo
NemoCake
Add caption

Nemo Birthday Cake

Nemo & Jungle Book


I made a Nemo icing cake for my elder nieces’ 2 ½ birthday. Actually I had to make two birthday cakes for my elder and younger nieces. My sister asked me not to put a lot of efforts on making two cakes but simply to cut the cake in half and separate the pieces. I only have a round shaped baking tray and I was thinking of various ways of creating two cakes out of a round shaped cakes. Not having a clear idea of what to do I just thought of cutting a rectangle out of the round shaped cake. Then I started putting the cut pieces together and suddenly realised that I can make a fish out of the cut pieces. Tadaa!! Problem sorted.  As soon as I realised I can make a cake in the shape of a fish.. I knew for certain that it is got to be Nemo..One cake sorted. But what should I do with the other? Luckily I had some readymade icing animals which I bought from  Woolworths the other day. The theme was “Jungle Book” and they were cute little animal faces. I thought I should make the second cake in the theme of Jungle Book. That the whole story behind the two cakes I have created named “Nemo” and “Jungle Book”

Creativity


It is all about creativity isn’t it. I am a project manager in profession and never knew that I had talent in making cakes. I discovered my ability when I created the first Elmo Birthday cake for my lovely husband. From that point onwards I was making birthday cakes for my family members. Each time I tend to come up with a new idea. Sometime my friends ask me whether I went for classes which I never did. I am not bragging but I tend to think that I do a pretty decent job in making something special for the loved ones. What I have shared and going to share are my hours of attempts in putting together something lovely and delicious. It is not an easy task but you feel some sense of accomplishment when everyone gathers around it and admires the outcome and asks all sorts of questions.  

Sunday, 21 October 2012

Elmo Icing Cake


Step 1: Bake the cake in a rounded shape 

Step 2: Please the cake on a tray

Step 3: Cover the cake in plain (No colour) icing 

Step 4: Draw the outline of Elmo using a tooth pick

Step 5: Outline Elmo using black writing icing

Step 6: Fill in Elmo’s eye balls using black writing icing

Elmo Cake


Step 7: Fill Elmo’s nose using orange coloured icing

Step 8: Use the same icing (Orange coloured) to create the bottom border of the cake

Step 9: Use red coloured icing and fill Elmo’s face

Step 10: Use the remaining red icing to fill the borders of the cake

Elmo Cake

Elmo Cake
 
 Step 11: Use plain (No colour) icing to fill Elmo’s eyes

Step 12: Use blue icing to fill the background 

Elmo Cake

Elmo

Elmo Cake
  
Step 13: Finish the border using blue icing

Elmo Cake

Elmo Cake

Elmo

Elmo Cake

Elmo Cake
  
Step 14: Enjoy the cake!!